How HVAC Repair Technicians Inspect and Fix Components of Your Home’s HVAC System

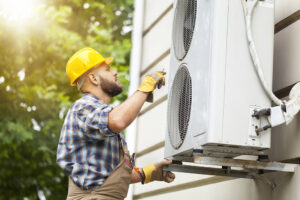
HVAC repair technicians inspect, maintain, and fix heating units, air conditioners, ductwork, thermostats, and fans. They also install new HVAC systems. Contact BEST HVAC COMPANIES IN CINCINNATI for professional help.

HVAC

Your HVAC system relies on air filters to clean the circulating air. The filter is made with fibers, usually fiberglass, that trap the unwanted elements in the air. These include pollen, dust, pet dander, mold spores, microorganisms, and other contaminants. When the filter becomes clogged, it stops airflow through the system. This affects how well the heating and cooling unit functions, raising energy bills.

Filter materials vary, and there are a variety of different types that you can choose from. The thickness of the filter makes a difference as well as how much you use your HVAC system. The lifespan of the filter also depends on lifestyle choices, including whether you have pets or smokers living in your home.

Typically, air filters are made from spun fiberglass or pleated paper surrounded by cardboard for stability and rigidity. They are inserted into a specific place within the return air duct of your home. The filters work as barriers to prevent contaminant particles and pollutants from entering or circulating in the system, or from reaching sensitive areas of your house. They are designed to block out pet hair, dander, mold spores, lint, and bacteria.

A standard filter is rated at MERV 1 to 4, while higher-grade filters have a MERV rating of 5 through 20. The higher the MERV rating, the more effectively the filter will trap and remove airborne pollutants from your home.

Changing the air filter regularly keeps it clean and free of contaminants, making sure the system is working properly. It’s recommended to change the filter at least every 90 days or 3 months, depending on your climate, if you have pets, and other factors. When the air filter becomes clogged, it restricts the flow of air through the system, making the system work harder to distribute heat or air. This increases your energy bills, but it can also damage the equipment and cause it to wear out faster. Keeping your air filters clean can help you avoid these problems, saving money and improving the health of everyone in your home.

Thermostat

The thermostat is a vital part of your HVAC system. It controls when the system turns on, and allows you to select the exact temperature for your home at different times of the day. When it stops working, it can cause all sorts of problems with your air conditioning and heating. Fortunately, with some simple troubleshooting and regular maintenance, you can avoid an HVAC repair nightmare with your thermostat.

Most programmable thermostats last anywhere from five to 20 years. However, this lifespan can vary based on how often you use your system and the quality of your thermostat. It’s not uncommon for older thermostats to develop issues that can affect your HVAC performance and lead to repairs.

Using your thermostat correctly will help you avoid these problems and extend its lifespan. You should make sure to keep it clean and free of grime. Dirty thermostats aren’t able to properly gauge the air temperature in your house. It’s also important to keep your thermostat away from heat sources and direct sunlight.

Thermostats work on the basic principle that heat makes things expand, and cold causes them to contract. A thermocouple in your furnace monitors the ambient temperature and uses this information to determine if it should turn on or off. A thermostat then sends low voltage (24 vac) to the thermocouple through a relay to start or stop the HVAC system.

If the temperature in your home is constantly changing, it’s likely a problem with your thermostat. A faulty thermostat can’t maintain a set temperature, and it can also overwork your HVAC system and cause your utility bill to skyrocket.

The thermostat is the brain of your HVAC system, and it’s the main way that you control how warm or cool your home will be at any given time. If your thermostat is having trouble communicating with the rest of your system, it can cause all kinds of problems. If you suspect this is the case, it’s a good idea to call in a professional for an HVAC repair service. A service provider will be able to evaluate your thermostat, and replace it if necessary.

Condenser Fan

The fan that sits on top of your HVAC unit’s condenser is one of the most critical components to the entire system. It works in tandem with the coils and compressor, helping to change high-pressure refrigerant vapor into low-pressure cool air. The fan also plays an important role in the dissipation of heat, making it a vital part of the overall cooling and heating process.

If your fan motor is acting up, the first step is to turn off the unit and check for power. Then, look for signs of a problem such as the fan not turning on or making strange noises. If these symptoms are present, it’s likely time to call a professional to inspect the fan motor.

Homeowners should also note whether the unit is experiencing vibration or not. These signs could mean that the fan blades are out of balance, which can lead to decreased efficiency and even system failure. Another possibility is that the motor itself is experiencing a problem and needs to be replaced.

Other potential issues with the fan motor include the capacitor not supplying enough electrical charge to the fan, which can cause it to either not start or stop working altogether. Homeowners can check for this issue by looking for signs of damage, such as a burnt-out cap or a burning smell. The reversing leads, which are responsible for controlling the fan’s rotation, can be checked as well by verifying that they are connected properly.

Lastly, the contactor relay can be checked for worn-out contacts that might prevent the fan from getting power. These are another part of the HVAC system that should be left to a professional, as they store high amounts of electricity and can be dangerous.

Ductwork

Your home’s ductwork plays an essential role in the performance of your HVAC system. When they are leaking, damaged or improperly sized, they can cause drafts, unequal heating and cooling in different rooms of your home, unnecessarily high energy bills, and poor indoor air quality.

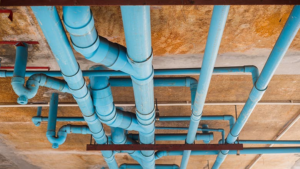
Ductwork is made from a combination of pipes, trunks, and other specialized pieces to deliver conditioned air to specific areas in your house. Some of these specialized pieces include stack boots and heads, which facilitate vertical air flow. Other types of duct transitions are take-offs, cleats, and turning vanes, all of which help to create pathways for air to move effectively through your ducts.

Generally speaking, most ducts are constructed from galvanized steel and aluminium preinsulated panels that are then joined together using a variety of different fittings. These joints are then sealed with a durable, water-resistant sealant. In most cases, the joints and seams are covered with aluminum tape, which also helps to seal the ductwork.

Over time, dust, dirt, and particulates build up within your ducts. This buildup can lead to a reduced indoor air quality (IAQ) and increased allergy symptoms among your family members. If left untreated, this buildup can even damage your ductwork over time.

A common problem is blocked or obstructed vents and return registers. This can happen when furniture, boxes, cabinets, and other large items are unintentionally placed in front of or on top of these openings. As a result, the conditioned air is forced to travel a longer route and loses efficiency along the way.

Other common problems are leaks, which can be caused by poorly-installed ductwork or by simple wear and tear over time. Leaky ducts release treated air into unoccupied spaces, which can overwork your HVAC system and ultimately lead to expensive repair bills or premature replacement. They can also reduce your energy efficiency, resulting in higher energy bills.

Finally, holes and crevices in your ductwork can allow pests like rats or mice to enter. These pests can saturate your ductwork with unhealthy contaminants like urine and feces. This contaminant saturation can result in a mold infestation, which can cause health issues for your family.

Why It’s Important to Have Your AC Serviced

Air Conditioning Repair Sherman Oaks technician can save you from high repair costs and costly replacements by handling AC issues early. This is the key to extending the lifespan of your unit.

Air Conditioning Repair

An air conditioner is a huge investment and a significant part of your home. Keeping it in good working order will ensure optimal performance and safety for your family.

Dirty evaporator coils are one of the most common causes of AC malfunction. The evaporator coil absorbs heat from indoor air to cool it down, but if the dirt builds up, it can prevent that transfer and cause the AC to work harder to achieve the same result. To check whether the evaporator coil is dirty, compare air pressure at the vents that take in indoor air to the output pressure at your air conditioner. If the difference is substantial, it could be a sign that the coil needs cleaning.

Often, the evaporator coil becomes dirty because of improper maintenance. The coil should be checked and cleaned regularly to keep it clean. However, it can be difficult to reach the coil inside your unit unless you have a specially designed access panel. If you’re unsure how to inspect the coil, an air conditioning expert can show you where it is and how to access it safely.

If your evaporator coil becomes dirty, the cold refrigerant can’t absorb enough warm air to raise its temperature. This causes water vapor to condense on the coil, which can lead to frost or ice build up. If the evaporator coil remains frozen, it will put a lot of strain on your system and can damage components such as the compressor and fan motors.

A dirty evaporator coil can also reduce the energy efficiency of your home, which can have a big impact on the amount you pay for electricity. You may even miss out on tax breaks or other benefits based on your home’s energy efficiency rating. Extreme clogging can even lead to system failure, which can cost you a fortune in repair bills and replacement parts.

Dirty Compressor Coils

If your air conditioner’s evaporator coil is dirty, the compressor coil will soon follow suit. Coils are important parts of the system and need to be clean in order for the system to work properly. Dirty compressor coils make the cooling process difficult for the system, forcing it to run longer and harder in an attempt to cool your home. This can cause significant wear and tear on the unit, which can shorten its lifespan.

One of the most common signs that a condenser coil is too dirty to function well is an unexplained increase in your utility bill. If your AC is running more often and still isn’t reaching the cool temperature you set on the thermostat, it could be a sign that it needs to have its coils cleaned.

Condenser coils are made of copper and filled with refrigerant. They are located in the outdoor unit of the AC, and they absorb heat from inside the house and transfer it to the outside air. The air conditioner then blows the cold air into the house. This cycle is repeated as the system keeps operating in order to maintain your preferred temperature setting on the thermostat.

When a condenser coil becomes too dirty to effectively absorb and release heat, the refrigerant in the system will begin to boil and lose its ability to cool the air. This is a serious problem because it can cause the compressor to fail, requiring costly replacement of that part of the air conditioning system. This is another reason why it is so important to schedule regular professional maintenance from an air conditioning repair company. A skilled technician will clean the coils and ensure that the rest of the system is in good working condition.

Low Coolant Levels

Engine coolant is a vital component of your cooling system, and without enough of it your engine will overheat. A faulty cooling system can also damage the compressor in your AC, so it is important to have your car’s air conditioning serviced before you run out of coolant.

If the warning light on your dashboard is illuminated, it means that you have low coolant levels and you need to refill it. You should always replace your coolant with the specific type recommended by the manufacturer, as using a different coolant could cause the engine to overheat and lead to costly repairs down the road.

The most common causes of low coolant are leaks or evaporation. Leaks can occur in any part of the coolant system, including the radiator, water pump, or hoses. The best way to prevent these problems is by regularly inspecting your cooling system and servicing it on a regular basis.

Other signs that you might have low coolant include poor fuel economy, a burning smell under the hood, or rattling noises coming from underneath the vehicle. Coolant contains glycol, which has a sweet smell and can attract children and animals, so it is important to keep it out of the reach of children and pets.

You may also notice that your air conditioner isn’t as cold as it used to be if the coolant level is low. The refrigerant in the AC is used for heat exchange, so it won’t get as cold if there isn’t enough of it. In addition, a lack of coolant can cause the coils to overheat, which will make your air conditioner less effective. A professional technician will be able to diagnose the problem and determine the best course of action for your vehicle.

Unusual Noises

If your air conditioner is making unusual noises, it’s not something to ignore. In fact, it’s probably a good idea to call an AC technician right away. Different AC sounds can indicate a number of different problems, and it’s important to understand what each sound means so that you can know whether you need to add an HVAC professional to your speed dial.

Clicking and rattling noises can often be a sign that it’s time for an AC repair. A clicking sound can be caused by a thermostat that isn’t sending power to the unit or a problem with electrical wiring. A rattling sound, on the other hand, may mean that a part is loose and could potentially hit the compressor or fan motor.

A buzzing noise can be a sign that there is an issue with your AC capacitor, which stores energy until it’s needed and then releases it to power the compressor. This issue can lead to the compressor overheating, which is why it’s essential that you get a New York AC repair service as soon as possible.

A dripping sound can also be a sign that there is a problem with your AC system. If the dripping is slow and pulsating, it might be something as simple as a fan blade that has come loose or a drip pan that needs to be cleaned. However, if the dripping is quick and irregular, it’s likely a sign that your coils have frozen over and will need to be replaced. A professional will be able to help you determine the cause of the problem and decide on a suitable course of action. This can prevent permanent damage to your air conditioning unit and help you save money on future repairs.

Warm Air Coming From Vents

One of the most common reasons for AC repair is when cooled air stops flowing through your home’s vents. This can be caused by a number of things, including clogged vents, a dirty air filter or an evaporator coil that is icing over. If you suspect any of these issues, it’s important to call a professional for AC repair as soon as possible.

Another reason for your AC blowing warm air is if the fan on the indoor unit has stopped working properly. The fans on the condenser and evaporator need to move to create air flow, so if they aren’t moving, it can cause a number of problems, including an inability to cool your house. Make sure that the vents are open and clean and that nothing is blocking them, like furniture or area rugs.

If you’re still not getting any cooled air, then it could be a problem with the ductwork. Over time, the ductwork can develop holes or tears that allow cooled air to escape before it reaches the vents. Air conditioning repair specialists can inspect and replace damaged ducts to restore airflow.

Another possibility is that your AC system has a clogged condensate drain. This line removes moisture from the air, which is then expelled through a drain pan and down a drainpipe. The drain can get clogged with debris, which can lead to water overflow and damage your system. You can usually spot this issue by noticing water damage near the drain pan and a musty, moldy smell in your home. If this is a problem, you can try clearing out the drain line by pouring a mixture of one cup of bleach and one cup of water down the pipe while wearing rubber gloves. If the clog is severe, you can hire a professional to use a wet-dry vacuum to clear it out.

Understanding the Basics of Plumbing Installation

Plumbing is a complex system that delivers fresh water and removes wastewater from your home—understanding how your plumbing works can help you make the right choices for your home improvement projects.

Plumbers in Lexington consist of the pipes and components that supply water, drain wastewater, and vent air. During the rough-in plumbing phase, plumbers install these main pipes before the walls are closed.

plumbing

The plumbing system in any building is a network of pipes that delivers water for use and removes waste. It is vital for life and work in buildings to ensure that the building has clean water for drinking, washing, and cooking, as well as disposing of sewage properly. A faulty plumbing system can lead to health and safety issues, so it is important to keep it in good condition. Plumbing work can include anything from repairing a faucet to installing a new shower. There are many laws and regulations that govern plumbing, so it is important to know how to perform plumbing work safely.

The first step in any plumbing installation is laying out the supply and waste lines. This process includes trenching and laying out the pipes, connecting them to the main pipe, and testing for leaks. Plumbers must follow local and state plumbing codes when performing this stage of a construction project.

Once the supply and waste pipes are in place, the plumber can install drain fittings and toilet flanges. The rough-in phase also includes determining the locations for sinks, tubs, and showers. This is important because these areas need to be accessible once the drywall is installed. The plumber must also install a stack that will carry the waste pipes to the sewer or drain line.

Plumbing is a complex and essential part of any construction or renovation project. It involves working in tight spaces and using specialized tools and equipment. A professional plumber will have the skills and experience to complete the job quickly and efficiently. They will also be able to diagnose any problems and provide advice on how to fix them.

If you are constructing a new home or renovating an existing one, it is important to hire a professional plumber for the plumbing. They will ensure that the installation meets all local and state codes, and will provide you with a quality service that will last for years to come. A plumbing contractor will be able to recommend the best piping, valves, fixtures, and materials for your needs and budget.

The drain of a plumbing system takes wastewater and other waste liquids away from the fixtures, funneling them into the sewer line. Generally, this is done under the lowest level of the structure or in a septic system.

A drain can be open or closed, passive or active. Passive drains rely on gravity, body movements, or pressure differentials to move fluid or gas. Active drains use intermittent negative pressure or constant suction to remove waste liquids.

When a plumber installs drain lines, they must be carefully placed to avoid problems down the road. For example, a water pipe should not cross over a vent line, which can create a backpressure that prevents the pipe from flowing properly. This could result in water leaking from the fixture or from the wall, which can lead to expensive repairs.

Another important consideration when installing drain lines is ensuring they slope properly. A drain line should slant down at about 1/4 inch per foot. This ensures the line will not become blocked by soil or other debris, which can happen if the line is not sloped correctly. It is also important that the bends in a drain line are smooth and not angled sharply, as this can also cause a buildup of debris.

In addition to proper slope, drain lines need to be well-ventilated. This will help prevent a condition called air lock, which can cause the drain pipes to fill with water. Venting the drain lines will also help keep water warm and reduce the risk of freezing in cold climates. If you have multiple drains in close proximity, they may be able to share the same vent line, provided it is large enough.

Once the water and drain lines are installed, the plumber can move on to the rough-in phase of the plumbing process. This involves putting in the sewer accommodation stubs, which connect the house to the main sewer line. It is important to set these properly, as improperly-installed stubs can cost thousands of dollars in repairs later on. It is also essential to have the correct connections between rainwater and wastewater pipes. The wrong connections can cause flooding, mold, and other serious issues.

A plumbing vent, also known as a pipe stack, equalizes air pressure in the drain pipes and lets sewer gases escape from the home. It’s usually located on the roof and directed above the house to prevent odors from entering living areas. The vent system also removes water vapor from the drainage lines, which helps the drains work efficiently.

A vent should be made of a material that won’t degrade under normal conditions. The pipe should be large enough to allow air to move freely through it. A vent that’s too small will clog easily, leading to plumbing problems. In addition, it should be properly installed and free of obstructions.

Plumbing vents are important, but they can be easy to overlook unless you own a home. Understanding these sensitive aspects of your home’s plumbing can help you keep your budget intact and your anxiety levels low when an issue arises.

Your home’s drain pipes need air to move waste and water through them, but this isn’t always easy to do in a tight space. The vent system ensures that your plumbing system doesn’t fill with water and waste by drawing air from outside, so it should be free of obstructions and properly positioned.

Vents are often a victim of blockages, as they’re exposed to the elements and make attractive nesting sites for birds and rodents. They can also be blocked by tree branches, leaves, or dirt. A vent that’s blocked will cause your drains to overflow or back up, and it can even lead to a complete drain failure.

In addition, if you hear gurgling sounds from your toilets or notice a strong sewage smell in your home, you might have a vent blockage. If the problem isn’t resolved, it could result in sediment forming inside your drain pipes, which will lead to further problems and hefty repair or replacement costs down the line.

It’s possible to perform simple maintenance on your plumbing vent, but a professional plumber is best for ensuring that it’s in good working order. An experienced plumber will check that the length of the vent meets local codes and makes sure there are no obstructions, such as critters’ nests or tree branches. The plumber can also repair the vent to prevent a build-up of ice and snow.

Plumbing fixtures are the components that supply water and remove wastewater from a building. They are also responsible for ensuring that buildings remain hygienic and safe. Without plumbing fixtures, it would be impossible to wash hands, cook food, or clean surfaces. There are many different types of plumbing fixtures available on the market, so it’s important to choose ones that will meet your specific needs and budget.

When choosing plumbing fixtures, it is important to consider factors like price point, design, and functionality. It is also important to choose fixtures that are compatible with your existing plumbing system and will comply with local plumbing codes and regulations.

In addition to determining the type and size of plumbing fixtures, you must also decide whether or not to use a toilet tank. While some people prefer the look of a toilet tank, others find it to be unsightly and inconvenient. Regardless of your preference, it’s important to keep in mind that your toilet tank will need to be vented.

Venting is the process of allowing air into a drain line to break up solid waste and help water flow more easily. All toilets, sinks, and tubs that discharge wastewater must be vented. This is important because it prevents a vacuum from forming in the drain lines, which could lead to clogs and other problems. Ideally, each fixture should be located within five feet of the vent stack.

Another consideration when choosing plumbing fixtures is whether or not to install a septic tank and sewer line. Septic tanks are designed to separate solid and liquid wastes, and they are a critical part of a home’s plumbing system. When installing a septic tank, it is necessary to have a permit and follow all local and state laws regarding septic systems. In addition, septic tanks must be buried at least 6 inches below the surface of the ground.

Before starting your plumbing project, it is important to understand the different parts of a plumbing system. This will allow you to make informed decisions and ensure that your plumbing is installed correctly. In addition, understanding how plumbing works will help you avoid costly mistakes and rework in the future.

Fantastic Tips To Try For Your Affiliate Marketing Needs

Affiliate marketing can be a great way to increase the revenue of your website, as long as you do it right. Working with affiliate marketers can sometimes be trying, as you may not have the information you need, in order to know who to work with. This article will provide you with numerous tips to get you started in the affiliate business.

If you want to make more money, diversify the products that you sell. You can find a selection of products that a particular niche would be interested in and then focus your advertisement towards this niche. Another option could be to reach out to different niches. Both of these methods have been proven and you should find what works best for you.

When you are pitching your product to a client, elaborate on what the product can do for them, instead of the actual design or functionality. Creating a more personal connection with the client can help them understand the value in putting money into your company, which will improve your business relationship.

When affiliate marketing include as many examples of the products you are trying to promote. Create videos, screenshots, or any other way to demonstrate that the product does what it is claiming to do. Be very specific when describing, explaining or reviewing each product you are linking to. It will encourage people to make the purchase.

Make sure you don’t irritate people with your advertisements. The last thing someone browsing the web wants while they’re watching a video or reading an article is an obnoxious ad covering their screen. Try to get the audience’s attention without annoying them, or else they’ll immediately be turned away from your product.

As was stated at the beginning of the article, affiliate marketing can be hugely beneficial to your website, as long as you are aware of the correct methods to use. Following the advice given in this article can make you a more informed affiliate and allow to you gain the most revenue from this method.

You can also visit our other websites and post your article.

Excelahealthevents.comHuman Center BusinessIts Your Day Weddings and EventsRobert Lawrence PhotographyShes the One FitnessAnna Pro Makeup ArtistTop Webhost GeekInterlocking Drive WaysOranges Pot LegalMount Barker PlumberSt-George-AsphaltAkron AutotowingThe Toronto Airport LimousineDelco Home InspectorBrown Law Offices AZCanusa Cycle ToursZager Plumbing and SolarDriveway Paving BramptonKingston Roofing and RepairsSoftouch DetailingAiretite Windows and SidingAmazing Appliance GuideBest Dallas Fence CompanyDivine PhotographyFireplace And Heating SolutionsGalloway MoversIntegrity Mortgage ServiceLegacy Foundation RepairOntario Vinyl DecksRobin Jarvis LawShine on CleaningSudbury MasonryWood Stock CabinetryBusiness ArticlesLake County LimoThe Viking Rock RadioHulllocal RadioWhich LocksmithPaphos HandymanImage Point PhotographyQuickbook SteamJW Lewis And SonsJournal For DentistsSuperior Plumbing InstallationsPolar ApplianceBalancing Act Book KeepingWest Accounting ServicesHealth Insurance DepthColorado Health BenefitsAnaheim Business List

Water Heater Repair – How to Repair a Leaking Water Heater

If a water heater leaks, it’s probably time for a replacement. However, a simple repair might be enough to keep it functional.

Water Heater Repair

Homeowners who feel comfortable working on plumbing parts might be able to replace the thermocouple or dip tube. However, they should never attempt a gas valve repair without the help of a professional like Hot Water Now.

The Thermocouple is one of the most important components of your Water Heater, as it ensures that your pilot light stays lit. A good working thermocouple will create an electrical current to the gas valve when it senses that the pilot flame is lit, which in turn will keep the gas flowing to your heater and allowing it to work properly. Unfortunately, this little device can go awry due to a number of issues, including buildup of carbon which insulates the metal causing a drop in voltage, or oxidation or even metal fatigue. In either case, the best way to fix the problem is to replace the old Thermocouple with a new one.

This can be a difficult project, and it is recommended that you seek the assistance of a professional for this task as it involves working with gas that is very flammable. First, shut off your gas supply and let the unit cool before starting work on it. Then, disconnect the metal housing from the wall and remove the nut and screw that hold it in place, being careful not to damage the junction box in doing so. Once the housing is removed, you can then begin working on removing the wires that are attached to it.

Once you have all the wires disconnected, you can then begin the process of replacing the Thermocouple. The simplest method is to simply replace the old one with a new one, though you will need to note how it is mounted and the location of the connectors so that you can get your replacement in correctly.

Thermocouples are inexpensive, so it’s not a bad idea to have a spare on hand in case of an emergency. They can be found online, and many home supplies stores sell them as well. In the long run, a functional thermocouple can significantly improve your Water Heater’s performance and safety.

If yours is not working, you should be able to tell by noticing that your pilot light no longer stays lit. It may also be that your water heater isn’t heating your water, or it’s displaying other signs of malfunction.

Element

The heating elements are a crucial component of the water heater. They are responsible for heating the water, but they can burn out over time. If you notice that your hot water is running out faster than it should, then this could be a sign that one of the elements has burned out.

Whether you have an electric or gas water heater, the element will need to be replaced at some point. A professional plumber will be able to identify the exact problem and recommend the best replacement options. They will also know what safety protocols to follow when dealing with high temperatures and pressure. A professional plumber can save you a lot of money in the long run by providing an accurate diagnosis and avoiding costly mistakes.

If you do decide to replace the heating elements on your own, it is important to choose a replacement that matches the length, mount type (screw-in or flange), and wattage of the old one. You can find these at your local hardware store. It is also recommended that you purchase a non-contact voltage detector to help you avoid getting shocked. Make sure that the fuses in your breaker box are off before you try to touch any of the screws on the front of the heater element.

Another thing to keep in mind is that the dip tube can also wear out over time. This tube transfers cool water from the top of the tank down to the lower element so that it can be reheated. If the dip tube is worn out, it can cause cold water to mix into your hot water, which can decrease the overall temperature.

The pressure valve is a small part that helps to release excess pressure from the water heater. Sometimes, this part can become worn down, which means that your water heater may leak. This can be a huge problem and should be fixed as soon as possible. This is another part that should only be replaced by a professional, as it can be very dangerous if you try to do it yourself.

Dip Tube

The Dip Tube is one of the most important components in your water heater, ensuring a consistent supply of hot water. It works by pushing cold water down to the bottom of your tank, keeping it from mixing with the hot water that rises up out of your faucets. A broken dip tube can lead to a lack of hot water in your home. Luckily, replacing the dip tube is relatively simple and can be done by any homeowner with a little patience.

In order to replace the dip tube, you must first shut off your power to your water heater. You can do this by switching off the circuit breaker for an electric water heater or turning off the gas control dial for a gas heater. After this, you will need to drain your water heater. You can do this by connecting a garden hose to the drain valve located at the bottom of your water heater and running it outside or to another drain. Once the tank has drained, you can disconnect the cold water pipe from the dip tube inlet and remove it using a flat screwdriver.

You will then need to replace the new dip tube, making sure that it is made from durable materials like cross-linked polyethylene (PEX). Simply drop the new tube into the cold water inlet and connect it to the inlet nipple by loosening the connector and nipple with a wrench and turning counterclockwise to remove them. Once the new dip tube is installed, you can reconnect the cold water inlet and restore power to your water heater.

Replacing a dip tube can be a great option for Water Heater Repair, especially if the issue idz early on and is isolated to a single unit. However, if the water heater idz aging or you have frequent issues with the dip tube, it might make more sense to invest in a new water heater that is energy-efficient and will likely last longer than your old model.

Pressure Valve

As the name implies, a pressure-relief valve releases excess water and steam from inside your tank in the event of a thermal expansion of your hot water. It’s also a safety mechanism that prevents the water heater from bursting or leaking, and helps to protect your home from flooding. It is a required component of all standard water heaters and some tankless ones.

The temperature-and-pressure relief valve (T&P) is typically connected to a pipe that runs downward, terminating a few inches above the floor. It is designed to open when the pressure reaches a certain level and the temperature reaches 210 degrees Fahrenheit, or when the pressure reaches 150 psi.

It’s a good idea to periodically test your T&P valve and make sure it works correctly. A faulty T&P valve could result in a burst water heater, and is a significant health and safety risk to your family.

Testing your T&P valve is relatively simple, and can be done without increasing the temperature or pressure of your water heater to unsafe levels. First, position a bucket or other container under the discharge tube to catch the water that is released when the valve opens. Then, carefully lift up on the lever of the valve and listen for a rush of air and water flowing into your bucket. When you release the handle, it should snap back down and shut the valve.

This is a simple, cheap test that most homeowners can do themselves. However, it is important to wear closed-toe shoes and gloves to avoid scalding water. You should also always be careful not to damage the discharge tube or valve when you’re lifting it up and down.

While most homeowners don’t think about their water heater very often, it’s crucial to perform these routine tests and maintenance on a regular basis. It is recommended that you test your T&P valve twice a year, and drain and flush the tank at least once per year to remove minerals and sediment. If you’re unsure how to properly test and care for your water heater, contact us to schedule a VIP plumbing inspection today!

How to Tell If Your Chimney Needs Repair

The first sign that a chimney may need repairs is a visible leak. A leaking chimney can deteriorate masonry and cause water damage to the surrounding walls. This is a serious problem that needs to be addressed before it worsens.

Another indicator that a chimney repair is needed is spalling bricks. This occurs when moisture enters brick, concrete, or stone, causing the surface to crack and crumble. You can visit Charleston Chimney Repair for more information.

The chimney crown protects your entire chimney system from harsh weather conditions like rain, snow, winds, and temperature changes. It is like the umbrella that keeps everything below it dry. If the crown cracks or breaks, water can easily enter and cause damage to the masonry, flue lining, damper, and other components. A cracked crown indicates that it’s time to call in a professional chimney repair service.

Chimney crowns can be repaired in several ways, depending on the type of crown you have and how much damage is present. If the chimney crown is made of brick, it may need to be rebuilt. This involves dismantling some existing brick courses and then rebuilding the rest. If the chimney crown is made from concrete, a repair service can fill the cracks and seal the surface.

A repair service can also use a chimney cap with a mesh that allows smoke and vapors to escape while keeping debris, insects, and small animals out. It also has a spark arrestor to prevent fires that could spread on the roof. A chimney cap is a great way to extend the lifespan of your chimney crown.

It’s important to get regular maintenance done on your chimney, including inspections and cleanings. During an inspection, a professional can spot problems with the chimney crown and recommend a repair service.

If you have small cracks in the chimney crown, they need to be filled right away. Even a tiny crack can let in water and other contaminants that can damage the masonry and lead to expensive repairs.

These small cracks in the crown can worsen over time. Freeze-thaw damage happens when water absorbs into the cement structure of the chimney crown, then freezes and thaws, damaging it.

Eventually, the cement can start to crack and crumble. If left untreated, these cracks will expand and allow more water to penetrate the masonry. It’s best to catch these small cracks while they are still relatively minor. Chimney professionals can fill in the cracks and seal them with a durable chimney crown coating. This process is quicker and less expensive than replacing the entire chimney crown.

Chimney leaks are a huge problem and can cause a lot of damage to your home. Water can ruin drywall, ceilings, wood, and more. It’s also a health risk, leading to mold and mildew. The good news is that there are a few things you can do to make sure your chimney is safe and prevent leaks from happening in the first place.

The most common reason a roof leaks around a chimney is the flashing. The flashing is a thin metal material that channels rain away from specific parts of your roof. The roofer typically installs it during a roof installation. It’s usually an L-shaped piece that goes up the side of your roof. One part is generally visible, and it’s called the counter flashing. The other, which you normally don’t see, is the step flashing under your shingles.

Flashing can get damaged from storms and rust. The sealant used to bond the flashing can also wear out, leaving your chimney vulnerable to water leaks. This is a repair that a professional can easily do.

It’s a good idea to check the flashing on all areas of your roof that are exposed to moisture. Chimney leaks can cause a lot of damage, and it’s important to stop them before they get out of hand.

Several products on the market are designed to waterproof your flashing. They have an elastomeric sealant and often have a fabric in them to reinforce the strength of the seal. You can find them at most home improvement stores and online.

If you have a chimney leak, call for an inspection. It could be expensive to do all of the structural damage resulting from a chimney leak, and it’s much better to catch them early. A regular maintenance cadence, including routine inspections, is the best way to prevent these kinds of problems from occurring in the first place.

A chimney is vital to heating and circulating air in your home, but it can also be a major fire risk if the bricks are not in good condition. Chimneys and vents must be free of flammable materials, including rust and creosote. Fortunately, you can often stop rust and other common problems with regular maintenance.

Bricks in the chimney can become damaged from water or extreme temperature fluctuations, resulting in cracks and other damage. These can compromise the chimney’s structural integrity and allow moisture to enter your house, which can cause mold or mildew and damage the wood lining.

The mortar that holds the bricks together in a chimney or other brick structure starts to wear out over time, mainly due to expansion and contraction caused by temperature changes. When this happens, it weakens the bricks and can allow smoke, carbon monoxide, and stray embers to get between the bricks or onto the roof. A chimney expert can repair cracks in the chimney stack with new mortar or rebuild the stack if it’s at risk of collapse.

Chimney bricks can also be prone to spalling, which is the crumbling or flaking of bricks from exposure to moisture and repeated freeze-thaw cycles. This can be extremely dangerous for your chimney and home because it allows moisture to penetrate the bricks, causing them to warp or collapse. A professional can replace the affected bricks and reseal the area to prevent further water damage.

If your chimney is lined with fireclay flue tile, it’s important to check the liner for damage regularly. The classic clay chimney liner is durable, but if it becomes cracked or damaged, the water and heat that flow down the chimney can damage the flue’s interior, leading to a leaky home. Modern chimney liners are made from stainless steel, which is durable, easy to install, and resistant to corrosion.

Chimneys are located high above the roof, meaning they’re vulnerable to storms and other weather elements. If a storm damages your chimney, it can damage the top of your house, leading to leaks and other issues. Suppose you’re planning to tackle a chimney repair project yourself. In that case, you must understand the dangers of working on a rooftop and have access to safety equipment, such as a harness, fall protection, and sturdy ladders. It’s also a good idea to have a professional inspect your chimney before beginning any repairs yourself, as they can recommend the best methods and tools for your unique situation.

White stains are commonly seen on the exterior of chimneys. While it’s easy for homeowners to see and brush them off as a part of the natural aging process, this white residue is more than just a cosmetic issue. The stains are known as chimney efflorescence and are a clear sign of water damage.

Efflorescence is created when water reaches the brick and dissolves the salt naturally contained in the masonry structure. When the water evaporates, it leaves behind a powdery white-colored salt deposit that is most visible on the surface of your chimney. You may also notice these deposits on basement walls, cement blocks, clay, sand, or other unsealed porous surfaces.

Chimneys that have a lot of efflorescence are likely to experience water infiltration problems shortly. As moisture is drawn to the masonry by gravity, it can work through tiny fissures and hairline cracks to the inside of the chimney.

Over time, the moisture can destroy the masonry and allow leaks to develop. These leaks can lead to a chimney collapse and, in severe cases, a house fire that threatens your safety and property.

When you see signs of white stains on your chimney, it’s best to schedule an inspection with a professional sweep. The certified chimney experts will determine the extent of the damage caused by moisture and recommend a course of action to repair it. This could include a chimney waterproofing application, chimney crown repair or replacement, brick-and-mortar repairs, and more.

In addition to the damage it can cause to a masonry chimney, water infiltration can destroy your home’s interior. It can ruin insulation, carpeting, padding, and wood if left untreated. Moisture that creates stains on your chimney also adds to the moisture in your attic, which can cause mold and rot in wood framing. This excess moisture can then be drawn down into the living areas of your home and ruin ceilings, walls, carpets, and other surfaces. A chimney expert will help you resolve the problem and stop the moisture infiltration as quickly as possible.

What Is A Residential Cooling Unit?

A Residential Cooling Unit is an air conditioner that pumps air into the home. The unit is normally located outside the house and is filled with refrigerant gas. This refrigerant, liquid at room temperature, is transformed into a gas when the temperature is lowered. The unit’s outlets are usually placed downwards to distribute heated or cooled air throughout the home. There are many different types of residential cooling units.

Condenser Assembly

hvac

The Condenser Assembly is the heart of any air conditioning system. It consists of a steel shell and a coil made of copper. Water flows through the coil to cool the hot gas. Air is fed into the shell from above, condensing as it contacts the coil. The gas is further chilled as it passes through a subcooling stage at the bottom of the shell. Occasionally, it needs to be cleaned. You can do this mechanically or by using a chemical solution. For more information, contact All Temp Air Conditioning & Refrigeration.

The condenser is the only mechanical component of the entire system, with the evaporator coil consisting of a box of fins and tubing with a drain attached to carry away the condensation. While these two parts are important, the condenser is where most problems are likely to occur. Therefore, knowing what to look for in a condenser assembly will protect you from being scammed by unscrupulous service technicians.

When replacing a condenser, it is essential to know the difference between air-cooled and water-cooled units. Air-cooled units have an outside unit, while water-cooled units are inside. In addition to residential air conditioning units, condensers are also used in industrial steam power plants. They are also found in heat pumps and industrial steam power plants. They are easy to access and require regular maintenance.

Zoned Cooling

One of the easiest and most effective ways to achieve consistent temperatures in multiple areas of the house is through HVAC zoning. The process starts with the installation of individual thermostats for each zone, which is linked to a central control panel. Several homeowners find this system to be a great way to achieve consistent temperatures in different parts of their homes. It also helps reduce energy costs. It also helps you avoid the thermostat battles that can arise when trying to control the temperature in different areas of the home.

A single thermostat for a single zone will not work in a residential setting, because it cannot cycle enough air in a small space. A two-stage air conditioner with variable speed blowers is necessary. This system is more expensive than a single-stage unit, but it is typically more efficient and has lower operating costs. While it may cost more upfront, it will pay off in the long run. It also provides more comfort for the entire family, which is an added benefit.

A zoned system requires separate thermostats and a sensor that relays this information to the central thermostat. Then, the HVAC unit is equipped with dampers, which are valves that control the volume of air being distributed from the main system to the different zones. Dampers will also help to solve heat issues on the upper floors. If you’re wondering how this technology works, here are some benefits. This technology will help you save energy and money on heating and cooling bills!

Energy Efficiency

While many factors contribute to the energy use of residential cooling units, one of the most important is location. The size of the equipment, the type of installation, and its operating schedule all play a role in energy use. Listed below are some examples of the most energy-efficient options. Here are some factors that can help you find the most energy-efficient unit for your home.

New residential air-conditioning and air-source heat pump systems must meet minimum energy efficiency standards by 2023. These new standards require that these units have seasonal energy efficiency ratios (SEERs) of at least 13.0. The higher the SEER, the more energy efficient the system is. The new standards also require that heating-powered air conditioners and heat pumps be more efficient than their southern counterparts. However, older homes may not have sufficient SEERs for energy efficiency.

Noise

Typical causes of noise from residential air conditioning and heating units include a malfunctioning thermostat or control, bent or lose fan blades, and loose or faulty metal ductwork and registers. Clicking, humming, or whistling sounds are more likely to originate from the duct system, such as a bad vibration damper or defective thermostat. But there are also other causes of noise. Here’s how to identify the source of your noise and fix it.

In some cases, humming noise in the HVAC system is caused by the fan motors of the compressors. This can happen when the motors fail to start. The humming noise can also be caused by a failed start/run capacitor or a malfunctioning motor. A rattling or buzzing sound from an AC unit’s compressor could be a sign of a faulty fan motor. Fortunately, most noises are caused by internal parts, which can be repaired.

Noise from residential cooling units can occur when the air conditioner is turning on or starting. When this happens, several moving parts begin to move at the same time. Fortunately, this noise goes away after a few seconds, although it may reappear as soon as a new cooling cycle begins. Other noises, however, may be the result of a malfunction or an improper installation. In other cases, the sound may be due to ice or foreign objects in the unit.

Size

When choosing a cooling unit for a house, you should consider the square footage of the rooms. To find the square footage, multiply the length and width of each room. Next, multiply this number by 25, and that will give you the amount of BTUs required for the rooms. One ton of air conditioning has 12,000 BTUs. Therefore, a 1.5-ton unit should suffice for a small-sized home.

The size of a residential cooling unit will depend on the number of rooms in the home, the number of windows, and the insulation in the house. An HVAC dealer can help you choose the best size for your home. Alternatively, you can get an energy audit from a qualified contractor or HVAC dealer. The Manual J calculation will consider the characteristics of your home, as well as the climate in your area. This will give you a good idea of what size of the residential cooling unit to choose.

The BTU rating of the cooling unit will determine its capacity. Typically, 1 BTU will cool a square foot. For example, one ton equals 12,000 BTUs. In other words, for every degree above or below the desired temperature, a one-ton unit will cool a square foot. Residential cooling units are typically smaller than commercial units. HVAC contractors can install two units to meet your cooling requirements.

Maintenance

Residential cooling units need periodic maintenance to keep them operating properly. The maintenance tasks include cleaning filters and inspecting vents. For heat pumps, maintenance also includes checking the evaporator coil and drain pan. Cleaning the evaporator coil will prevent it from becoming clogged with debris, which can impede airflow. Keeping the drain pan and filter clean will help prevent the accumulation of debris. Additionally, if you have shrubbery or plants near the cooling unit, clean the leaves and debris that may accumulate around it.

Maintaining HVAC units will extend their life and keep you comfortable all year round. You should schedule maintenance appointments at least once a year, usually in the fall and spring. Regular maintenance will help ensure the efficiency of your unit and prevent a breakdown in the future. If you do not regularly schedule maintenance appointments, you may end up paying more for a more expensive unit in the long run. Also, keep in mind that older HVAC systems require more frequent servicing, which can damage the unit.

Air conditioning systems are essential for keeping the home cool during hot summer months. Without routine maintenance, you run the risk of experiencing delayed or reduced system function and diminished lifespan. A professional can help you avoid problems by scheduling regular maintenance appointments and following through with any minor issues. Regardless of the size of your HVAC system, regular maintenance can reduce the likelihood of emergency repairs and costly breakdowns. By scheduling regular checkups, you can ensure your home’s cooling system is running as efficiently as possible all summer long.

Latest Fireplace Design For Modern Generation

Fireplace Design

The fireplace is a focal point of the home, and the right design can elevate a room. This season, designers are pushing the boundaries of fireplace design with sleek and modern options.

A seamless recessed fireplace is an instant focal point with an effortless elegance. Pair it with eye-catching tiles to create a captivating masterpiece that will leave guests in awe.

Lime-washed brick

Limewash is a low-maintenance brick makeover solution that adds historic-feeling chalky color to your home. It’s ideal for old buildings with masonry surfaces, but you can also use it to transform newer brick homes. Unlike modern paints, limewash doesn’t peel or chip; it soaks into the brick for a permanent and durable finish. It is also antibacterial and fungus-resistant.

To apply limewash, prepare your brick by cleaning them thoroughly. You can use a pressure washer or scrub them with soap and water. Then, mix hydrated lime with water in a bucket to the consistency of whole milk. Make sure you wear a dust mask, gloves, and eye protection when mixing. Once your mixture is ready, apply it to your brick walls using a brush or roller. Allow it to dry for 3-5 days. If you want to apply a second coat, wait 24 hours between applications.

If you’re looking for a more modern approach to fireplace design, consider a recessed wall unit that seamlessly integrates into the wall and oozes sophistication. Designed to accommodate your TV, other media devices, books, and specific display items, this feature will keep everything organized while adding an element of elegance to your room.

Another way to update a traditional brick fireplace is to paint it a solid color. This bold look creates dimension and contrast, allowing you to highlight your fireplace as the focal point of your room. You can also opt for a monochromatic theme to create a calm, peaceful feeling in your space.

Marble subway tile

The combination of classic beauty and modern aesthetics makes this fireplace design a jaw-dropping masterpiece. The stunning marble tiles accentuate the sleek, contemporary arrangement and give it a refined appeal that will surely impress your guests. It’s also a great way to showcase your design taste and show off that you have a knack for decorating.

Marble subway tile offers a versatile option that works well with a variety of decor styles. Its neutral tones complement both light and dark wall colors and can be installed in a variety of layouts including herringbone, running bond, and vertical stack. It’s also a good choice for backsplashes, showers, and bathrooms, and can even be used as a countertop.

You can also choose to frame your marble fireplace with shiplap, which will enhance its clean-faced design and make it stand out. This style is a good choice for homeowners who want to add texture to their homes and are looking for a more dramatic look. For a striking effect, consider using a gray color to add more contrast to the white stone.

A reclaimed wood mantel is another way to add a natural element to your modern fireplace. It’s a great alternative to traditional stone and looks beautiful with wood floors. It also pairs nicely with a modern or transitional kitchen, and it’s a perfect choice for anyone who wants to add a touch of nature to their home.

A glass-enclosed fireplace is another trendy way to add a modern feel to your home. It’s a great way to bring in more natural light, and it can even serve as a focal point. This fireplace was built with a custom-made design that allows it to house a large TV, books, and other decorative items.

Gray concrete

Decorative concrete is a great way to transform a traditional fireplace. It can be colored in a wide variety of hues and can create a beautiful accent that complements the surrounding decor. However, there are a few things to keep in mind when using this material. First, you should know that concrete is a durable material that can last for decades. It’s also easy to clean and maintain. It’s important to select the right concrete color and finish for your project.

Gray concrete is a popular choice for modern fireplace designs, as it combines the calmness of blue with the warmth of tan and subtlety of cream. It is also versatile and works well in contemporary spaces.

It is also relatively inexpensive to produce. It is made with the same ingredients as other types of concrete, but the cement has a tint that gives it its distinctive gray appearance. Depending on the type of concrete, it can even have a greenish tint. Luckily, this can be corrected by adding dyes to the mix.

The best thing about gray concrete is that it can be mixed in a variety of colors. The coloring is either integral (added to the mix during production) or topical (applied afterward). In either case, the color will change the look of the finished product.

For example, sage green concrete can be created by mixing in chromium oxide green pigment and the proper amount of gray cement. Previously, this color could only be produced by mixing gray and white cement. Now, you can achieve the same result with only white cement, which is much easier and more consistent. This method also allows you to control the color’s tone and hue more precisely.

Clean-faced stone

If you’re not a fan of a traditional brick fireplace but want to update your living room with a bold style statement, try a clean-faced stone design. This minimalist approach lets the natural beauty of your hearth shine, blending seamlessly into the overall aesthetic of your space. The neutral hues of the stone also complement any color palette and blend easily with a variety of decor styles. If you’re looking for a more unique design, consider adding a modern fireplace with a stone wall that extends to the ceiling. This eye-catching feature will instantly elevate the ambiance of your home and make a memorable impression on guests.

The timeless allure of marble paired with sleek tiles elevates your hearth into a stunning masterpiece. This cutting-edge recessed fireplace design is the perfect balance of elegance and refinement. The ethanol burner is seamlessly integrated into the sleek tile surround, making it a seamless addition to your living room.

For a more modern aesthetic, skip the mantel shelf and decorate your fireplace with a collection of decorative items. This simple and minimalist approach allows the fire to take center stage. This streamlined look is perfect for a contemporary space, while still providing plenty of visual interest. If you prefer to keep things clean, opt for a white hexagon tile that can be easily customized with your favorite decorative accents and colors.

Unlike traditional brick, clean-faced stone is fireproof and durable. It’s easy to maintain and is a good option for homeowners who aren’t comfortable with an open flame. The natural tones of the stone also pair beautifully with earthy and rustic furnishings. The best part is that it’s a budget-friendly way to add a modern fireplace to your home.

Shiplap wall

Modern fireplace ideas often incorporate a more sleek aesthetic and are designed to be the focal point of a room. However, this doesn’t mean that they have to be simple or basic. In fact, some of the most modern designs incorporate a wide range of materials to create a unique look that is sure to wow guests. One popular option is to use a shiplap wall. This unique type of wall is made of pine lumber with grooves that are layered together to give the room a rustic farmhouse feel. This is a great way to add warmth and texture to any space.

Another way to add modern flair to a traditional fireplace is to paint the surrounding walls a bold color. This will draw the eye to the fireplace and add a pop of color that can be balanced out with neutral furniture or accent pieces. This is an easy way to update a fireplace without having to invest in a full remodel.

If you’re looking for a truly modern fireplace, consider adding a double-sided gas burner that is visible from both sides. This new trend in modern fireplace design is a stunning feature that will make your home stand out from the rest. Whether you choose to install a beautiful EcoSmart Fire Flex 86PN peninsula fireplace insert or a longline ethanol burner seamlessly integrated into a wall recess, this design will bring your home up to date.

If you’re not ready to commit to a complete renovation, a modern-looking shiplap wall is a stylish and inexpensive alternative to stone or brick. You can even add a mantel to create a traditional look. Just be sure to choose a neutral color for your shiplap so that it will match any decor.

Navigation